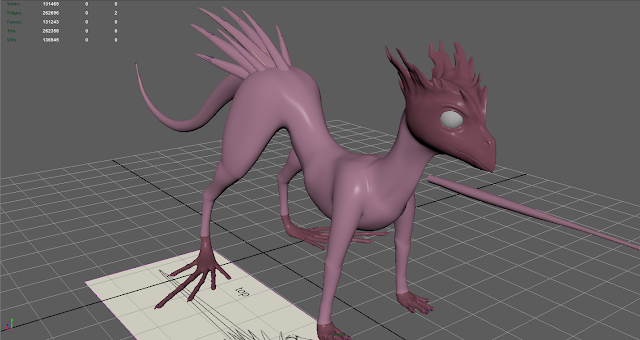
The priority today was to clean up the UVs on the feet of Colo Colo. I used a technique similar to how I smoothed out the UVs of the tail and the torso, where I converted the limbs into long, uniform tubes in an attempt to square out the UVs. For the front paws I also modified the UV maps to mimic the flow of the rear-foot UVs
I didn't reduce the number of UVs used but I do believe I have streamlined the use of space on the UV maps in preparation for including the UVs for the quills, which I have finally made. I also looked into smoothing the UVs of the beak.
The quills all share the same UV, and I added a few bones within them which can be used to allow for the addition of sway when the creature is running about. These things are meant to be flowing due to their light weight as opposed to the fluid structure of the tongue and tail so by comparison I inserted very few joints
The final task I performed in this session involved sewing up all the body parts. This smooths out the model, eases up the number of models on scene and more fluidly connects all the body parts. I was also able ot use the connectivity to do some model cleaning, most importantly Colo Colo's armpit, where I removed one ring of geometry which loosened the look of the armpit and appear less like the iner muscle was pinned to the shoulder.
It has become confusing to rely on the UV editor in the workspace so I decided now would be a good time to add a preliminary texture file, which distinguishes the two maps I am using. Provided below are the two UV maps, the areas they covered indicated by two basic shaders. In the final model these shaders will share very similar properties and was done so I can more easily map out the UVs. More importantly, these two shaders shall be the groundwork for what could become a somewhat complex texture map, as it was suggested I could build in a degree of sub-surface scattering - a lighting/texturing technique that I learned last term.


Well done :) the UV's look well set out and the rigging looks great
ReplyDelete