After a hard few days the composition is complete. While looking for a background I came across photos of Zhangjiajie National Forest Park, world famous for its hundreds of vertical pillars of rock which for me really hit home with the vibe of the Treacy city which is that the designs reflect patterns and structures in nature. So a mountain range that is the opposite, resembling an urban environemnt, seemed like a perfect fit.
Its unlikely the Chinese government would actually build a city i nthe heart of the park, but such is one of the liberating things about fiction. Who knows, this might not be a unique sight if you look though China hard enough. It is a very big and diverse country.

Showing posts with label The "what If?" Metropolis. Show all posts
Showing posts with label The "what If?" Metropolis. Show all posts
Friday, 10 July 2015

Huabanliuyu: 3D rendering complete
Well it's almost done. Most of the assets are there, the last thing I'd say it needs is the background which hopefully shouldn't take too long. That however, might also need some work to accomodate for the higher amount of sky visible in the scene compared to the still image. Fortunately I have more confidence in a crisp image thanks to the painting skills I developed over the course of the year.
Wednesday, 8 July 2015
Huabanyiulu: Midground Progress

With July 10th looming I got cracking on the other stages of the animation. Today was the turn of the midground. To make things more interesting with the assortment buildings I twisted up the geometry to reflect aspects of Treacy's organic style. Time restraints and an effort to focus the eye mean these companion buildings are pared down in terms of detail compared to the more important structures, which use shaders while others use some simple textures that were recycled from other areas of the model. While working on hiding the opera house I discovered the matte opacity slider for blynn, background and lambert textures, which when tweaked appear to get rid of the ghost geometry. My best guess is that matte opacity "flattens" the model when light is taken into account but I might be wrong, I will have to see what it does to a model that I can see to understand what it does.


Perhaps not the best effort but one of the primary things I considered adding was detail to the ground. In previous entries this was some basic contouring. Today I added an ocean shader to what should be the river that flows around the city to make it look at least vaguely like water.

The forest ground appeared too flat for my liking, so I did some experimentation with bump-mapping to add a little texture. Not the best but I think it does some sort of job at giving the ground some texture to it.

There is a narrow band of a brown shader between the water and the tree texture. However I later discovered that after I added the lines I had created a definite and even ridge to the hill. In spacing out the geometry and smoothing the hill out, I discovered a rather appealing "roughness" to the shadowline that I think gives the area some depth.
The last frame is me fully satisfied with what I have and another all-night render has been planned. The initial frames are currently taking a little over 7 minutes each to render, an estimated average of 8.6 frames an hour (although the first hour has produced nine frames and a bit). This may get slightly faster as the focus changes and there are less lights and wireframes to deal with than the last phase.
Tuesday, 7 July 2015
Huabanliuyu: Opera House Done
After a couple of days rendering, the opera house layer of the animation is close to completion. There could still be some fade-in fade-out work (which may require some extra frames at the start), I can leave the most render-heavy component (due to the lighting) for later and refine the other parts of the animation. I may also have to consider more frames to create a more gradual transition between the different render sessions.
Huabanliuyu refinement: Lighting the opera house.
It hs been several days since the last post and I would like to finally present some progress. Above is the result of some tweaking with background buildings to get a more convincing-looking metropolis in the background. The other large change is the deeoplemt of a river groundscape which is at a higher elevation to the buildings. While this may lose the feeling of height from the scene, I had done so because I felt it was extremely important to get a 3D environment as I had cut corners during the project in order to save time.
I mentioned in a previous post that I had gotten a render time down to 15 minutes per frame for the scene. Because the opera house was the most well-lit of all the buildings in the scene, I decided that I should render it seperately from everything else. However during the ensuing rendering sequence the rendering times climbed to half an hour for each frame, which I felt was unacceptable and eventually warranted further investigation in how i could save time.
After two days of rendering I looked into streamlining the opera house further. I changed what the lights illuminated so that the computer was not trying to calculate any unneeded illumination. It was then I discovered that at some point during the building of the scene, I had linked the ambient occlusion node to the transparancy factor of the opera house's main platform, which is where I believe a lot of the render time was going. After tweaking the light connections and getting rid of the transparency conection (setting it to zero but I had to tone down the specular rolloff and eccentricity) the 30 minute render times dropped to 10 quite promptly. This dramatically upped the number of frames I could make in an hour from 2 to 6
I was worried the slow render times would take me off track but now that I have only 60 of 250 frames to go, I might be able to get the opera house part of the sequence rendered by the end of the afternoon.

First render test using the background shader technique I used for Infiltrate Exploit Spread hit a snag. As can be seen, the buildings appeared to use Maya's background colour (which I changed to sky blue during development) as shadows.

First test I tried to fix the problem was to set the backgroudn colour back to black, but this only succeeded i ndarkening the surface shadows from sky blue to black. And altering the shadow intensity on the background shader to zero did not work either.

What did work was checking for Maya to ignore rendering the objects themselves, which when performed leaves shadows and reflections floating on an invisible surface. This proved to by the method that worked.

Closer inspection however, reveals that the new opera house is slightly darker with a slightly less intense illumination brought on by the reduced specular intensity to cmpensate for the now-missing transparency factor.
Friday, 12 December 2014
Project 2: WHat If Metropolis: Final Render.

I spoke with Stitch after the crit and he suggested I should consider using harder brushes to give a more solid feel to my work, which I can understand as I might have for the most part been using fairly soft brushes and I guess it does show with the matte painting. I was advised to go for a more photographic look (which I can achieve with photoreferencing and using real photographs as a guide), so it is a good thing I placed the city in the middle of China.
Thursday, 11 December 2014
Matte Painting

Didn't take long to make up a matte painting for the final presentation. The image on the right is what I will be using. I used the background of the original concept piece as a base but did some serious tidying up of it before adding the lower half. The image below is the painting as it was before I added the city at the back. I admit I may have gotten sloppy with keeping record during the crunch time however.

Wednesday, 10 December 2014
Long-Awaited Update

With some rendering on tutorials underway I thought an update of my project was long overdue. At least I am just about ready with my textures. However I regret one or two buildings may have to be left out of the final render due to pacing and a hint of me biting off more than I thought I could chew. But I digress, just about everything has had bumpmaps, specular maps and texture maps assembled and some of them are looking pretty good wraped around the models.
 It did feel something of a slog getting to this point but now that I have (barring maybe one texture map) reached the point I can install everything and test the lighting and hopefully everything should be ready by Friday.
One thing all this texture mapping has aided me with is getting brisker with painting. While some of the painting surfaces started off confusing, there are times I ahve taken the work in my stride, other times I needed to push myself, but I feel like I am almost. ALmost over the crest of the hill, although it took a couple of late nights to manage it.


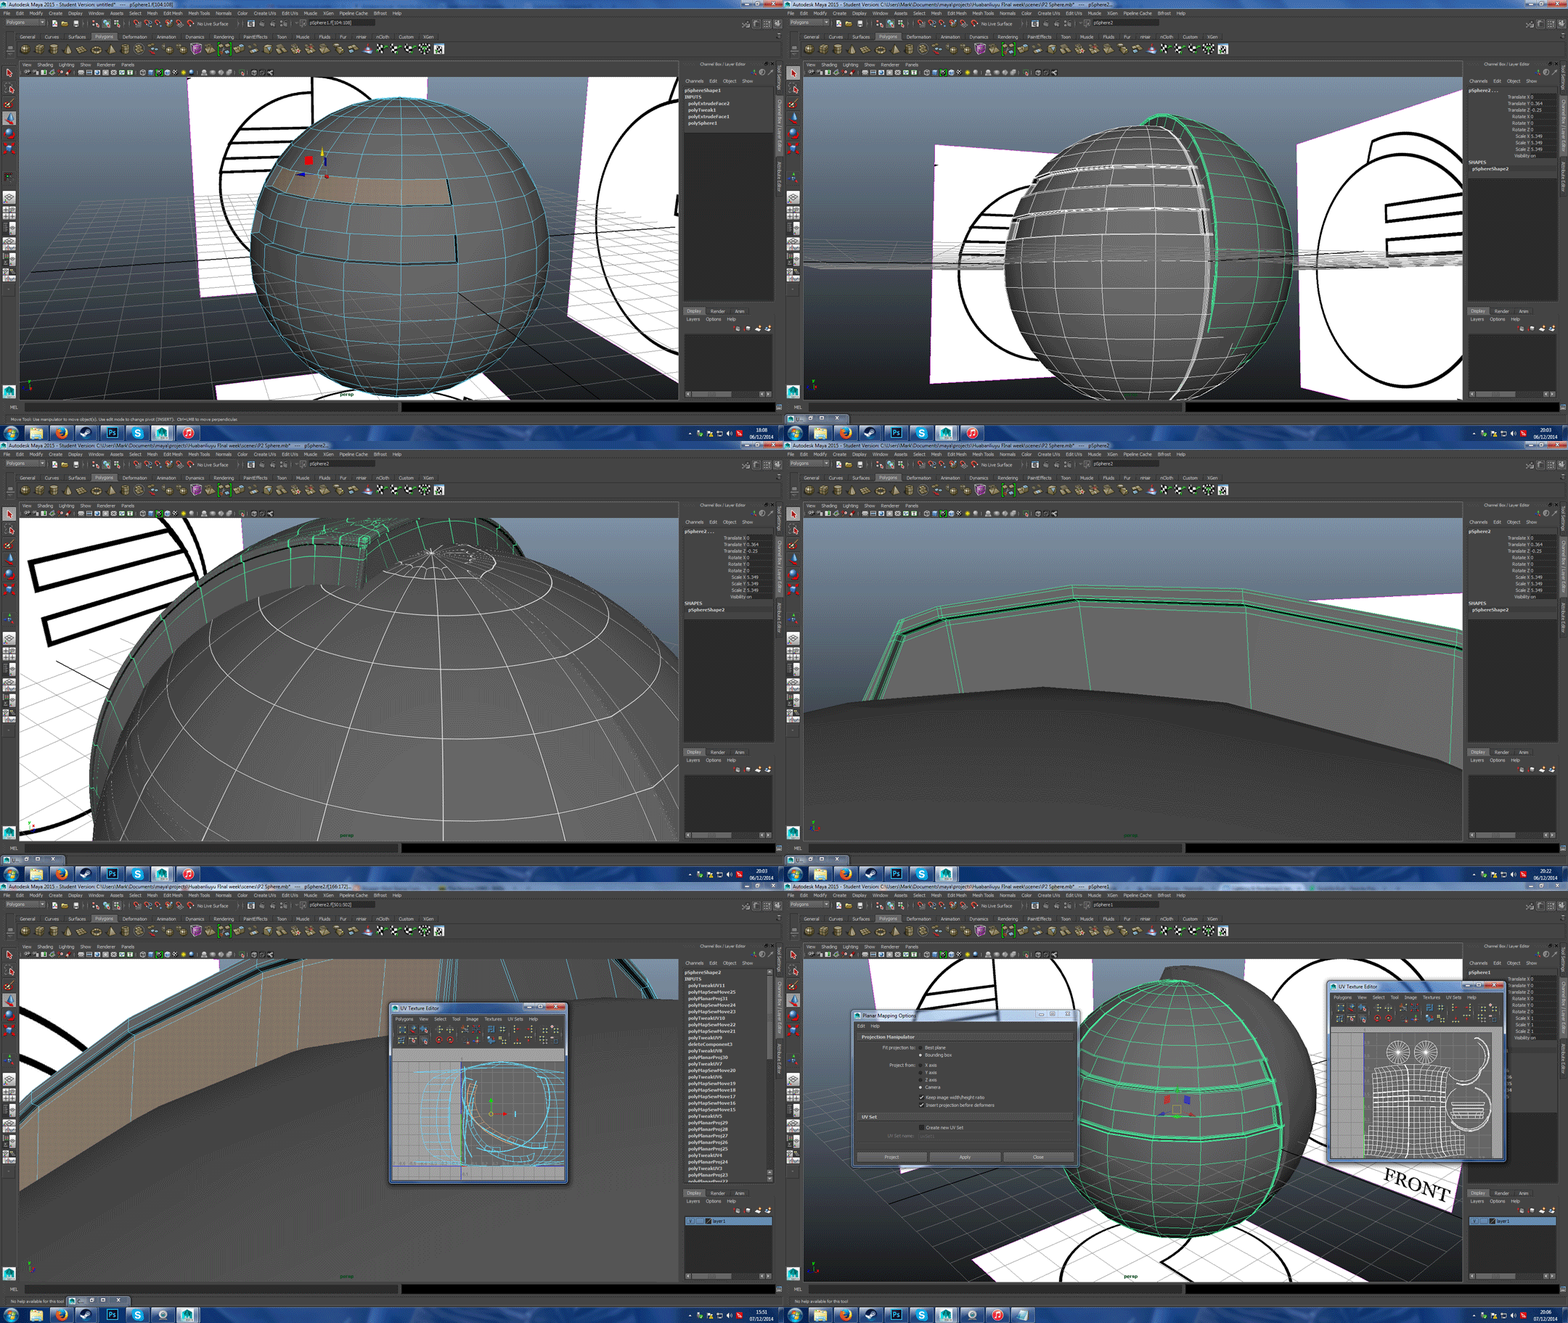
Of the current models I have, all the texture mapping I have left is the closest balcony (the one which in my concept art looks like a boat hull) and a dome to hide the joining of the sails on The Star. However given current circumstances I am contemplating perhaps dropping the boat-hulled balcony or moving it because the building it was supposed to connect to had not been built. And with the deadline approaching I am not sure if I can make it in time as well as doing all the peripheral things such as catching up on reviews, making the matte painting and assembling the presentation.
 The positive outcome of this is that the whole scene could come out less cluttered.
As in the concept I had crammed buildings in based on the blackout I
had constructed with the ground only partially seen far down below. With
less buildings, more of the ground could possibly be seen, giving a
feeling of more space in this elevated world that has been constructed.
The positive outcome of this is that the whole scene could come out less cluttered.
As in the concept I had crammed buildings in based on the blackout I
had constructed with the ground only partially seen far down below. With
less buildings, more of the ground could possibly be seen, giving a
feeling of more space in this elevated world that has been constructed.

Friday, 5 December 2014
Maya Progress Update: What If Metropolis

Chance has smiled upon me! I have made a ton of progress since my last update which I neglect keeping up-to-date. When I loaded up photoshop on the baseroom computers this afternoon it loaded up the screenshots I had made before Maya last crashed, which I was able to save and transfer to my memory stick. During this morning's CG Artist's Toolkit lesson I made progress with some of my smaller buildings, particularly the balconies that will connect to larger buildings which came together quite promptly.
 I also made progress with another minor but notable building, the Arrowhead; designed to go between the star and the sphere This one made me feel comfortable as I managed to assemble and UV map it within the space of 3 to 4 hours. It's close in complexity to the Beak-shaped biulding but I feel confident that I am working more swiftly as much of the work is now done.
The slowness and a feeling of pressure came from me going back to the platform and correcting the geomertry as the "mirror geometry" function had made the whole thing a mess as a few of the itnersection points combined into one vertex (I have found I can alleviate this by duplicating the object and setting the X value to -1), making triangles out of quads. There were also issues with the vertices when it came to smoothing the while thing for rendering so I ended up going back to the model constantly to tweak and sew vertices and edges which became mentally straining.
However I have persevered and all these models now have had their UV maps arranged and exported ready for texturing and rendering. There are only a couple of buildings left to assemble but they are not too complicated in principle. Other than that I feel more on track for the coming Friday. All-in-all it felt like a very productive day and a pleasant change from the progress of the last few days.


I also assembled some simple disk art that would have gone on the front of my disk. I decided on something less busy compared what I made for Invisible Cities as I get the impression this is a concept art disk. So its purpose would presumably be more about looking tidy and professional than looking flashy and eye-catching. Because I have a printer at home I can work on the jewel case cover when I have the time.
Wednesday, 3 December 2014
Project 2 Modelling Update

Construction of the hero prop is taking shape. I have a solid idea for a texture map which I will need to go about refining however after having lunch I had a bit of a creative stumbling block after making three unsuccessful attempts to start construction of the beak - all of which resulted in a fatal error when I rener-previewed what I had without changing the render engine from Viewport 2.0. The deadline is closing in and the fesire is to finish this. So I wil lsee about pushing forward.
I have made some trial-and-error progress on the silk tower but I neglected to snapshiot as I went as I constantly alternated between Maya and Photoshop. But it's mainly due to the mesh I have so I hope this problem doesn't come up when it comes to rendering these other buildings which haver more confined meshes.
Tuesday, 2 December 2014
Project 2: Tuesday Design Updates

This morning I decided ot set to work o nthe diffuse map for one of the city's skyscrapers. Just before i started I recalled ot myself that rarely are the surfaces of even the most pristine and seamless skyscrapers ever a single uniform sheet. So I set about designing a more true to-life appearance where part of the resulting texture would come from the seams between the panes. For the final image I do plan to tone down the grooves so that they don't completely drown out the. look of the panes.
 The hexagon idea may be a bit spur-of-the-moment and I might or might not not carry it though with the rest of the city, the idea being that this is an aesthetic city so your typical mass of square panes felt dull to the eye. Hexagons provide am ore intriguing look as they "slot in" to the sctructure far more easily and effectively and maintain a stronger structure than a square frame. Along with toning down the grooves, I plan to add some more visible framework to break up the current look and giving the windows a little glint.
Due to the highly reflective nature of glass, a blinn shader or chrome layer would be useful to bring out its scheen.

After watching Suspiria I headed dow nthe the baseroom to spend a couple of hours on The Star, reworking what I had doen so far, one of the majore features of the new model being a kind of balcony wall around the outside so peopel won't fall off. After UV mapping this one spoke, I duplicated it with the others and combined it all with the disk in the middle to create a single contiguous surface in which I will place the texture maps for the surface of it. After finishing these I moved on to the building at the back and after working on the balconies I think I should be able to quickly build up the shells on top of the biulding.
Monday, 1 December 2014
Project 2: Further Production Art

Creating these kepy production images has helped a fair bit in working out the right colour scheme for my buildings, as well as pinning down the finer details. It's hard to see but I also added a miniature figure next to what have nicknamed "the silk building" on account it reminding me of a fold of fabric. I'd considered a greenish/teal colour for the windows after looking back on my colour considerations for the star platform, while also maybe being inspired by jade - a precious form of rock that is both highly valued and closely tied to China and the surrounding countries. It rose to become treated as something akin to a combination of alabaster and gold in the Mediterranian; precious, beautiful, and carvable into all manner of wondrous shapes. Although I do wonder if I run the risk of the colour looking a little sickly.
 I also wondered about incorporating a little organic into the structure, as the idea I have proposed for Huabanliuyu does make it sound like the residents were inspired by plant life just as Philip Treacy was inspired by nature's patterns and structures when it came to his hats. There's still a bit of work to do on the platform (the legs for instance) but I do feel like I am further cementing my visual image for the city. I might in fact go for the Silk Building to be my test prop, as it is both present as a foreground element and the design is a lot simpler in its geometry than the star or the platform.
Sunday, 30 November 2014
Project 2: Key Concept development

Friday, 28 November 2014
What If Metropolis Project: Part 3

It feels embarrassing but I decided ot restart this tower again after trying what I considered doing in a previous blog post and it is all because of the focal point caused a few issues with the arrangement of the edges radiating outwards. This time I tried a new technique involving the cut faces tool to create something that resembles a Spirograph creation.

I became vastly more familiar with the "merge components" function during this session as some pieces were disconnected from the edges and I could more easily create what Maya's render preview function would recognise as a contiguous surface.

Using the extrude and edge loop functions I was able to extract the geometries that I needed for the top of the building. I also have to construct this bearing in mind that there are two similar buildings that will be in the composition; one that occupies the foreground and one that occupies the midground, meaning I may eventually have ot design a more detailed version of the building.


After mapping the UVs for this building, which is probably the best out of all attempts, I moved on to tackling the "star" prop of my composition. Working on prior buildings helped a long way to familiarise myself with the tools and skills that I would have beeded realising it but it is still far from done.

Utilising the skils I acquired from creating a symmetrical structure with the platform, I made use of the mirror geometry tools and mirror cut tools to create a ring of eight petal-shaped outcroppings to which more planters will be placed.

Production wasn't perfect, as I made four separate attempts to create a design with minimal clipping but I eventuall managed ot settle on a technique that involved a 24-spoke cylinder in the centre. Each petal would have two edges meeting it, I duplicated the petals (which unlike the main floor I did not scrap at any point), I would look for the line of intersection and, from the centre of the cylinder I extended a "cut faces" line that bisected the two petals. I then removed the clipping faces, neatened up with some careful application of the translation tool on the misaligned vertices.
I then removed half of the petals and mirroed the geometries. As luck would have it, the while thing snapped together beautifully.


There's still a good deal of work to do however. For one, when I preview the renders, all the petals split at the seams so I will need to connect them all up. I'm trying ot avoid crazy hours like 2 in the morning since often it caused me to wake up late. Despite how tempting it is to keep working.
Thursday, 27 November 2014
What If Metropolis Progress: Modelling part 2

With the Zoatrope done I decided to move on with my projects and continue work on the final urban scene. WIth the platform msotly complete I decided to move on to the feet which will plant the building firmly (if possibly precariously) on the ground although that part won't be seen.

For the rear foot I decided trying a more composite shape, I cut a cylinder in half, cut the forward face off a cube and stiched them together, exploring the various tools to try and fix them together, eventually coming across the "combine" and "merge components" tools and after playing around with the settings and highlighting what I wanted, I managed to successfully sew them together, a trick I ocntinued with the platform later on as what I had created the other day was, in my mind, very messy; three different components slotted into each other, mirrored haphazardly and with all sorts of unneeded debris inside. Thiss took a couple of hours to which I familiarised myself with the snap-to function for the translation tool and altered a lot of geometry before finalyl creating the UV maps for the whole thing.

The building on top was, thankfully, relatively simple to make, it has no base and sits on top of the platform. When it comes to texturing I think I might have to include the roof with the exported UV map for the platform itself so that I know where this part of the building is when it comes to arranging the flowerbeds that are situated on top of it to for ma roof garden (which due to the distance from the final scene's camera I will kep it as a texture map).

The platform itself was still a little messy so to save myself time, after cleaning up the
interior and making sure the whole thing is one contiguous model I
sliced it in half and mirrored the geometry down the middle. Endsuring
for a perfectly symmetrical structure.

By about 7:30pm I figured that the Maya work for this platform was just-about done.
My next task for this would be extracting the UVs, creating texture
maps and then using those to create bump and specular maps to give it
depth. Then it will be roughly ready for installation.

Potential masochist that I am I decided on my way home that finishing this one building was not enough but in leaving i only realised part way back home that I had left my progress saved onto the network (which I can pick up tomorrow) so rather than continuing with the model I thought I'd try a different structure at home - namely the skyscraper behind the platform.

I must restarted about five times with this one due to the tricky shape of the gap i nthe middle. Starting with a cube then switching to a circle and experimenting with various ways I could slice it open. Eventualyl I did so, extruded out a hole i nthe middle and then cut out the bit I had extruded far below the model itself.

When it come to shaping the horizontal planes I think I screwed up somwhere because after shaping the front, Iended up shaping so the tower's interior also went inwards, which it doesn't on my orthograph. So after a couple of attempts to rectify I figured it might be best to work that bit from scratch. Fortunately I had yet to remove base of the model so my plan is to duplicate the geometries of that, extrude it, extend it and then morph it.
Subscribe to:
Posts (Atom)