Showing posts with label personal. Show all posts

Sunday, 19 May 2019

Four Redux - Biolab Walls Redesign Progress


  Coming back to my old work and upgrading it has so far been an enjoyable exercise in design techniques. Transforms, textures, warpings and UVs, all sorts of tricks have been used to give a serious touch-up on what I have previously built.


  The most engaging stage so far has been trying to keep the look authentic while also making a distinct style. The laboratory run by Smithston-Wessex, the megacorp funding an expedition to a far-off planet, is clean, slick, but this hides the more insidious nature of their work. While it might be a little safe to design a sterile look for one of my major forays into environment modelling, the uncomplicated nature allows me to focus on clean design. Which, with that mastered, can be a springboard for more daring aesthetics.


  I have brought the environment forward in time a little. Looking back on my references, I was always inspired by the styles of the late 1960s and mid 1970s. Too contemporary for the original Star Trek, a lot more in line with Space 1999 and 2001: A Space Odyssey

  The new design however might have creeping elements of Star Trek: The Next Generation, which developed its style in part from the visual re-imagining given to the original Star Trek series for its films. What I mainly took from this series was maybe the cleaner, rounded styles (which was popular in the Sixties) but definitely the large bands of fluorescent lighting. Along the ceiling and stretching from bottom to top, this design choice is really good for giving an illuminated feel to a room. A little impractical if you're actually within the room as it basically has you staring into a fluorescent light wherever you look, but definitely a feature emblematic of the era's science fiction film and television.


  I did not want to go overboard with the creep towards the 80s. Although it is going to be interesting to combine this with the Ridley Scott-esque corridors of the base since I made a few subtle changes to the shape of the doorways and window openings. Not that I'm too worried, I considered redesigning the doors anyway.


  True to form, I'm not done yet with this style - apart from the obvious bits like the need for a ceiling and a floor, I want to remake the doors to the isolation chambers (as well as the isolation chambers themselves) in that tapered peak threshold but in a way that is far more in line with the aesthetic I am going for. What I have in mind is to adapt the panelling already used for the door and window to fit the door to the isolation unit, which might need more bulk as it is supposed to be more heavy-duty than your typical base door.

  Could be adapting what I have, could be I design new geometry for it. But it will be enjoyable.


  For now I have decided to focus on the biolab itself. In a sense, it is my "hero" environment, where most of the project takes place. The corridor, which in previous efforts was designed as if it were a focus, will come later as it can be attached to the windows looking out into the rest of the base.

Mock environments, locked doors and reflected, polarised or shuttered windows could be used to make the base appear much larger than it really is.


  And just as a demonstration of the difference, here is the biolab design in the first attempt, with a few props, a door and a window to give an idea just how much of an overhaul this has been. To say it has been significant however I believe is an enormous understatement.


Personally I can hardly tell these are intended to be for the same room.

Friday, 3 May 2019

Baths of Caracalla and the Long Overdue Progress Update


For the past month, much of my energy has been on the development of the Bathhouse of Caracalla. An elaborate bath spa complex completed in Rome under the emperor Caracalla by around 216 AD. This enormous complex served as a communal bath house for the City of Rome, but it was so much more; it had the typical setup of three bath rooms but also a gymnasium, libraries and was surrounded by avenues of shops that would have sold everything from fine linen to freshly cooked snack food.


  What got me most interested in this project was the opportunity to design fine architectural features. Decorated composite Ionic-Corinthian columns, veneered marble, columns both structural and decorative, expansive layouts and grand hallways covered in recessed stonework. It still feels like I have only started but the layout so far is already looking rather beautiful.

And that's not even getting into possible props for the location like water, incense burners, oil lamps, potted plants, tables, benches, seats, the list goes on!


  I found myself reintroduced to xNormal, a piece of software for converting 3D geometry into 2D maps for lower resolution models. While still possessing some shortcomings, I wouldn't have close to the level of detail I have managed to push out of this project without it.My PC, and any potential rendering engine, could have overloaded with the amount of detail required to make this project even remotely convincing.

If it wasn't evident already, one of my favourite parts has been the columns. The capitals were initially a by-eye estimation, but after doing research into the carious types of columns I realised there was much more to them than any old fancy decoration. There was an artistry to the classical column which I needed to replicate.


  Without xNormal, these columns couldn't have been as detailed as they are. The same can be said of the terracotta roof.A large building would require many terracotta tiles, but individual instances of these could have been a nightmare to visualise on even a high-end PC. With xNormal I have been able to simplify the geometry by a huge margin. Still rather detailed, but to a degree that is much more manageable.


One of the advantages to the symmetry of classical buildings is a lot of what is featured on one side of the building is present down to the last brick on the other side. I find this does cut down my workload, as I only need to worry about once side of the building. Bring that up to a high standard and I can then swap everything over on the other side.


  There is still quite a lot to do. What I have been thinking for a while however is to bundle many of these elements into kits for sale on ArtStation so other aspiring artists and architects can use them for their own architectural projects. The common elements like pillars, walls and ceilings should be easy enough to bundle together. I am still deciding however if the roof tiles would be a kit on their own or if I combine them with the wall and column kits. If anyone is in need of the geometry for a Roman style non-reinforced concrete dome I would be happy to oblige!


  The more I finish though, the more I feel there is more to do. This has been an interesting project so far, but the itch to move on to something else is starting to set in. When I showed a friend a block-out for a mountain palace I had sketched out a couple of years ago to alleviate some fatigue, he thought it would be a great showcase for level design. I might do the same to keep things fresh and avoid the onset of single-project focus fatigue.


The real baths of Caracalla took some five or six years to build with hundreds of labourers working and stone from across the Empire (Egyptian marble was one prominent material) hopefully me all on my own doesn't take nearly that long to complete this rendition of a major Roman landmark.

Tuesday, 29 May 2018

Back to Basics with Digital Drawing


  I've been going back to basics lately with my drawing skills. I've had a nagging feeling for honestly quite a while that my colour depth palette has been rather muddy. I've noticed I get lost in getting the shade just right at the expense of how clear the composition is. So, back to basics; getting familiar with the essentials of blocking colour first before moving on to tackling light and shadow.

  After all, many projects are 20% crunch, 80% cruft. You want to get that 20% foundation right or the whole thing just doesn't work.


  This new approach I feel has also given me a chance to back away from relying on dark lines to delineate shape. The pictures I have been drawing lately have been moderately popular on Reddit which is good for exposure. I'm getting plenty of feedback and starting plenty of conversations about what I've been working on. It could be some time before I'm back to full-shade digital painting like I've been doing before: I'm taking this one step at a time, so when I am ready to start adding shade again I am definitely ready.


  Moving away from the same old character subject, I've experimented with map design using Adobe Illustrator. I've found it and PDFs amazing for condensing enormous images into something I can easily send to clients. When I tried buildign something like this on Photoshop, it would slow my computer down as the images, plus layers, might be over a gigabyte in size. Which my computer did not like.

  But it was mostly fun to try map-making, which I have found to be an amazing way to build a setting as they say you can tell a lot about a place by reading into how the local inhabitants drew their maps.


Tuesday, 1 May 2018

First Week with Zbrush


  The past week or so I've been experimenting with Zbrush. It's quite advanced compared to Mudbox and I can see why a lot of studios are asking for experience with it. It's versatile, complex, and I've found I can get an outline of something after about half a day of working.


  So for now I've mostly been trying to see what I can make out of a single ball. As I had hoped, my experience with Mudbox translated well. I've yet to try texturing, that's going to be something of a later stage experiment.


  Considering how long it has been since I last touched sculpting software I was slightly surprised at how well I was able to create a face I've had people describe as handsome and good-looking, That's likely a very good thing when this is my first attempt at human features and started out with a generic template head. The drawing classes  msut have contributed considerably to that.


  Overall, I've enjoyed the product so far. Really glad I invested in it. I've already been asked by friends if I could sculpt their own characters with this, which means I'm either appealing to eager friends or I might have a creative skillset I can really sell.

Monday, 9 April 2018

Megacity Skyline and Structures


  Getting back into design I had the incentive to look at a few building ideas. Although for experimentation I might try something more...familiar. Artstation has a new challenge going on so I might try that, get some practice looking to the days of the Old West.

  It'll be far less monolithic than this weekend's drawing, far less colossal but as a period before the kind of construction we know today it's also an avenue for more characterful architecture.


Friday, 30 March 2018

Personal: Monsters Misfits and Serpents


  I promised myself I'd try something a little more alien and out there and for the most part I think I'm on the right track.some of these still have that dinosaur DNA but others (my particular favourites of this being 3, 5 and 9) are more bizarre, more something unknown.

  I believe there is enough character in each of these to tell a story for each one. What they are like to speak with, what their tastes are, maybe even what they consider to be artful or in good taste. I've grown to like turning rough shapes into creatures, a few of these I had a clear picture in mind but others started off quite vague and abstract. 9 I believe was quite random to begin with and some unexpected things came out of 5's outline.

At a pinch, it is possible that all or most of these could exist within the same universe, perhaps under the same banner.

Thursday, 29 March 2018

Personal: Signing off an Old Design


  Circumstances on my end has calmed down a little, as March was a very busy and unexpected month. So as way of an unwinding I went back to an old favourite of mine. The way I keep drawing something similar suggests one of two things: Either I have run out of ideas for modifications, or I have hit upon a final design, long time coming this is true. But that means one part is out of the way for something potentially more fun and creative to explore:

Costumes!

  The other good sign is I've shown this pose to a few friends and they said it looked "noble," "majestic" and "regal" which is what I'm largely going for. With the icons out of the way, I can approach something more out-there or alien with a clear head and a confident approach now that one of the more major designs in my head feels settled. I need ot get my head out of this one design and into the more weird and wonderful world of other aliens and monsters .

It should be a more wild endeavour from here on out.

Monday, 19 March 2018

Personal: Heart of an Empire


  I've wanted to get back into creating with Maya now that I am in a more confident place at home. It was a surprising lesson these past couple of months how your environment can influence your motivation. Bygones are bygones now, and I want to get back into my A-game. 


  I've been tweaking and polishing this planet today, making the city lights appear more convincing and giving substance to the ring around it (a discussion session online suggested to me their old distance might risk exposing visitors and occupants to highly lethal levels of radiation. I suppose high-tech science fiction shielding could protect them, and there was even a suggestion the ring-builders could have found a way to clear the radiation belts, but that distance was also impractical for ferrying freight and commerce, which benefits from a low-hanging belt. Shorter transit distances and all that.


  I thought about adding more than one ring because the engineers would not be limited to one orbital structure, and could hang more off the first (maybe even, fur, five, or ten!) And even this massive ring might have its limits for a civilisation connected to millions of other planets. So like any ground project, the infrastructure could have been expanded in times past to meet increasing demand.

 If I ever get this animated, it could be fun to surround the planet with dancing particles that represent hundreds to thousands of incoming and outgoing starships. Watching The Expanse lately I've been enamored with the introduction sequence, particularly the streaks of light that represent 100 years of interplanetary shipping and the timelapses showing urban growth and the great projects undergone in the series' backstory.


   I believe the Expanse has been one of my major influences regarding this project. Studying satellite photographs of the Earth at night helped a lot in building a convincing night-time illumination.A place can be as much a character as a person or an object, it's all about knowing how to convey that story without words.

Sunday, 25 February 2018

Mosquitro Redesign: The Needle


  I spent some time today modifying the head of my mosquito model. After adjusting the lenses so the pole would be pointing outward, the whole shape appeared to nestle more smoothly into the gap designed for it.There was some adjustment needed but these were only a few tweaks. There does appear to be a fair amount more flow, however as the geometry for the eyes runs more in line with the cavity for the head..


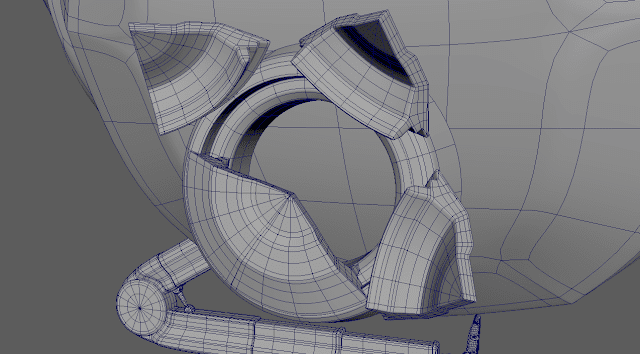
  The next big challenge was the port for the mosquito's proboscis, which in the mechanical model would function like a powerful injector. I had a stroke of inspiration that the port would open up like a flower. The mechanisms for this however, might require some thinking as the needle would either push these petals out or they'd open out in preparation for the needle extending..


  The model is quite detailed, so I am planning to look into making a normal map for a simplified model for more full-body shots of the vehicle.


Wednesday, 14 February 2018

Mosquito Redesign: Working Legs


  I didn't have much success implementing an IK nor getting it to compress, but they say the simplest solution is often the most effective. In the case of my piston the simple solution was to parent each of the pistons with each other, tie them to 'aim' themselves at the opposing hinge and create a few driven keys to mimic the pistons extending and compressing.


  After that it was a simple matter of constraining each of the hinges. and the pistons so they stop at a fixed instance into and out of their sockets. By adding a fifth segment to the leg I am able to extend its reach to a motion window of between 92 and 168 degrees (any more open and the piston will collide with the knee hinge). Which might be one of them ore complicated elements of the model out of the way.


From what has been assembled so far, I think I can easily fit six of the legs into the main body with plenty of room to spare.


Tuesday, 13 February 2018

Mosquito Redesign: Leg Hydraulics and Industrial Fun


  Much of this afternoon has been spent reworking the leg to make it something more industrial. I've looked into completely redesigning the limb using the hydraulic system idea to give the legs weight and balance. What I've got so far appears to work to a decent degree, even if the geometry might be a little heavy. I'll look into fixing the UVs before the leg is repeated.

  The piston that would appear to keep the leg unbent will use some manner of spline to adjust itself. I'll need to perform some experiments to get a system that can extend the segments - what is on display is the furthest the leg can bend with this but with some clever re-positioning I might be able to extend the leg further. I can also use the freedoms presented by the digital medium to make it easier for the base to compress into the pivot it's connected to, allowing the sections to fold in and extend automatically and the pivots to rotate appropriately. This further tweaking might also allow the lower leg to more easily fold in.


  That still leaves how to fit six of these inside the body. The folding in isn't the most efficient use of space, it could be the legs are arranged diagonally and drop through hatches in the mosquito's underside (which will be fun to build and set up). Only one leg will be worked on until the UVs, bones and controls are set up, which will be reproduced five times.


  Overall, it appears to be quite a flexible setup. The leg bends in the right place, the lower joint provides most of the positional mobility and the foot has full free rotation so it can plant itself flat in a large variety of poses. An IK/FK system could be used for deployment, positioning and resting as one thing that could be implemented are shock-absorbers at the ankle - a simple tube that compresses into the body to give the feeling the machine is bearing weight when its turns its engines off.


It's about ready for the UVs