Showing posts with label year 1. Show all posts

Friday, 26 September 2014

Invisible Cities Set 5 to 8

 With these four sets I feel like I am starting to get an idea of which cities I might be interested in, although given how I have only done eight thumbnails so far out of a possible 20+ it may still be early doors as to which city I will short-list for my three artworks. With these images I decided to experiment with silhouettes, viewing angles and perhaps looking more closely at interiors.
Argia was somewhat challenging to visualise, as Calvino's descriptions indicated the city was potentially entirely filled in with dirt. Sky, streets and houses were stuffed to bursting with clay and rock so I wondered how to express it. I did consider elaborating perhaps the citizens having a relationship with the roots or the worms, and like Armilla I didn't restrict myself to humans being human-sized; roots of colossal proportions could inhabit caves and tunnels that make up the city. Perhaps the people have an innate ability to move the earth somehow?
     One mental image that surfaced when imagining this place came from the 2005 Steven Baxter novel Transcendant. In one chapter the protagonist visits a subterranian hive of near-humans that live and communicate llike members of an ant colony, complete with a queen, drone castes and a lack of individual independant thought among members. Those other than the queen that interacted with outside influences were rather harshly euthenised by the collective as their minds would struggle to bear the magnitude of the world outside their colony.
    Despina was one of the fist cities I exaimed when I read Calvino's extracts and was the one which at first stuck in my head the most. Perhaps it was the contrast of the fleet-like skyscrapers from the desert and the dual camel humps from the oceon. I figured this was a description of the skyline so I tested that idea as well as considering other portside aspects such as tavern interiors  Its probably the most intriguing and out of the earlier ones it is not bearing a potentially-bleak-looking population (something I felt reading about the lives of the people in Argia and Anastasia), and it seemed like a generally thriving and largely enjoyable place to live for the common man.
  One of the other investigations I tried was colour contrast. With Anastasia there was emphasis on coloured stones such as agate, onyx, chalcedony and chrysoprase and a possible culture revolving around cutting and polishing these stones. So what I tried to imagine is that while the city is colourful and beautiful, perhaps walls studded, it hides an ethic where the only pleasure comes from work. So there is perhaps a colourful and drab side of the city that exists side by side with each other - perhaps colourful stones at street level and more drab colours at higher levels where the eyes of the city's residents are less likely to look. Or perhaps the other way around, coloured stones inlaid in upper-floor walls where visitors are more likely to look on their travels though the city while residents keep their gaze to the more drab ground and first floors of buildings.

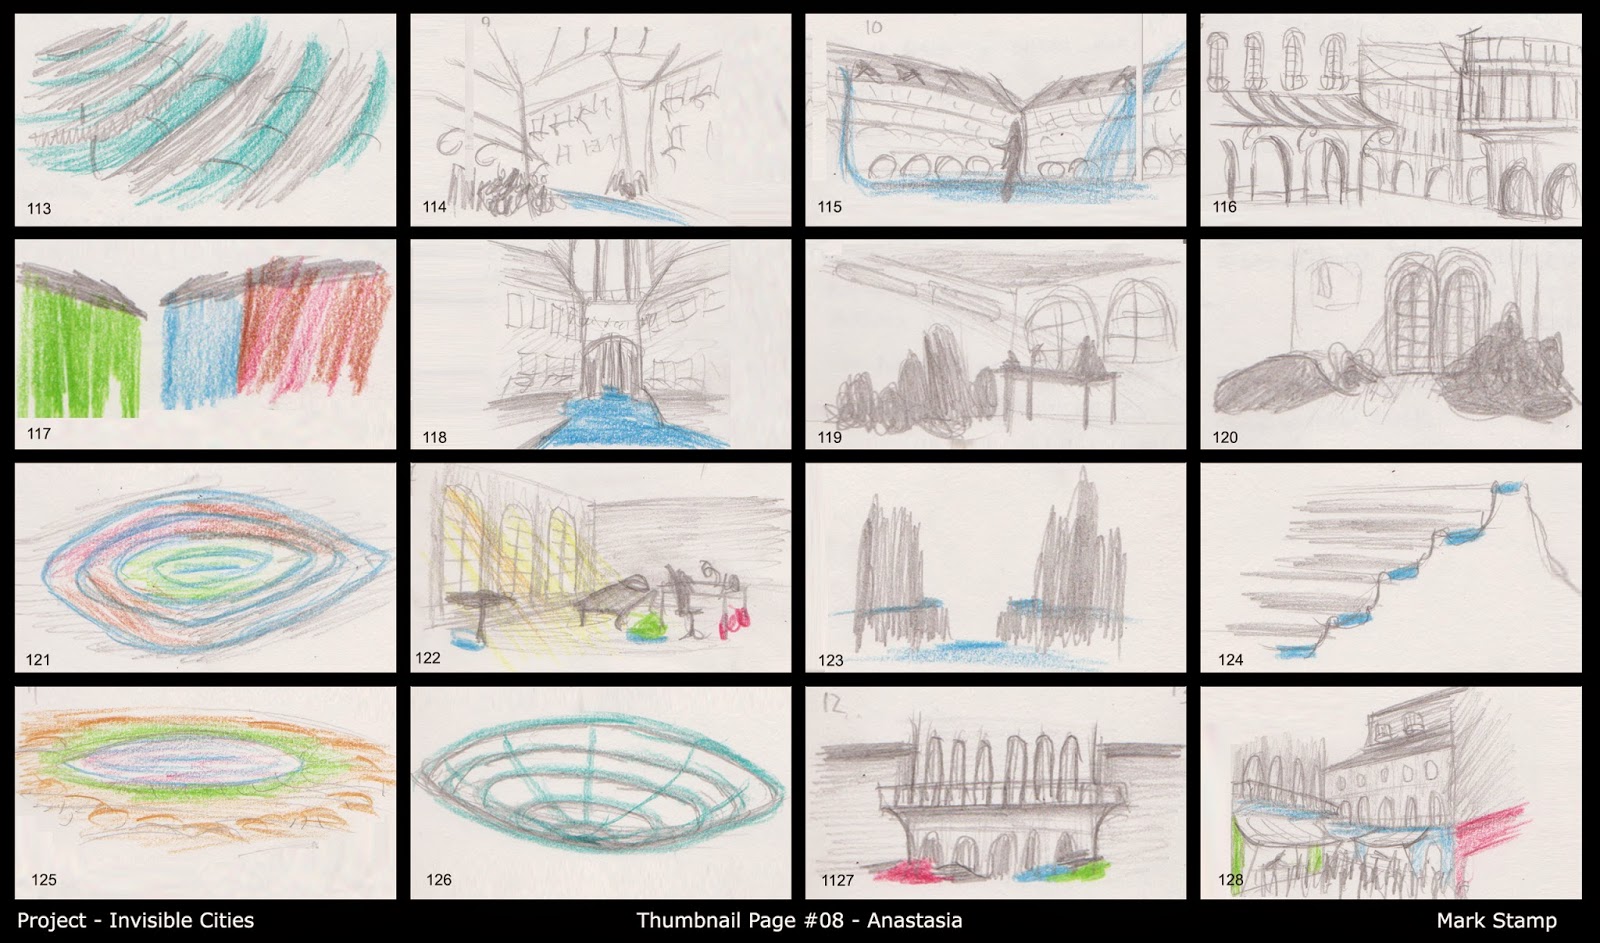
One trhing I have gotten the impression of regarding these cities - the people. In several of them the people sound like listless entities; daily routines, uncomfortable living conditions, being content with a bleak metropolis. It was as if Maro Polo wanted his listener to be both mystified and wary of these cities inhabited by strange shades of human beings. I might be looking too much into this though

Wednesday, 24 September 2014

Invisible Cities Thumbnail Set 4

    At first glance I think I may be going backwards with these images - back to Photoshop, back to digital work, back to work that looks  presentation-grade than brainstorming than sketch grade and back to camera shots. There is a wealth of media I would like to explore beyond this (for one I have a box set of inks that have been sitting in my toolbox for i-don't-know-how-long that I might contemplate using again) which I might explore as these first four sets were part of my Photoshop workshops. With these done, I'll look at other media for the other cities.

    One thing that caught my imagination with Armilla was in looking beyond the literal. At first I thought "how do I make a cityscape out of what is described as nothing but water pipes with no other part of the buildings?" I then started getting ideas when Calvino began talking about Nymphs inhabiting the water and got the idea that perhaps it is the nymphs and dryads (water spirits in Greek mythology) that were the city's real residents. Maybe the pipes themselves were the city superstructure with the water spirits living inside them? With homes, shops, venues and parks everywhere inside the pipelines? Although as I tried to finish I think my sense of imagination started to wear down near the end so I came to the thought of "lots of water everywhere"

    Probably not the pinnacle of what I can come up with for this project but I guess I could consider some of these aspects for other cities.

Update: Impossible Cities sets 2 and 3


 Managed to get some work done on these thumbnails. I think I am really getting into this project, its clear that Calvino's attempting to express the beauty and magnificence of each city to Kublai Khan and the reader as both these cities are described to be inhabited by people who have all they need or all they desire to be satisfied. Its this sort of thing that drew me to this course, the idea of worldbuilding or crafting beautiful cities that may or may not be possible to build.

With Baucia I began to veer off the idea of houses on sticks and imagine fields of gigantic wheat stalks, perhaps reflecting the bounty that the citizens have and require in order to never return to the ground. perhaps the city is filled with gardens filled with delicious fruits and vegetables (something I could include another thumbnail set perhaps?) The trickiest thing so far is perhaps interiors as Calvino only gives vague hints as to what the interiors of homes and venues look like.

Tuesday, 23 September 2014

Invisible Cities First Thumbnails

I worry about procrastinating for my first project so I figured I may as well upload the only set of sixteen that I have completed. The two other sets are currently a work-in-progress mostly because I was unfamiliar with drawing using the lasso tool and combining copied images with ideas each one in the space of a single minute so while I understand that thumbnails are supposed to be rough, most of them could be considered either rather abstract or really crude.
I've gotten to at least halfway with each of the other two so hopefully I can complete those soon, but since its almost 3/4 done here is set two. I had a complete breakdown trying to get though set three due to time pressure and ended up with something perhaps barely presentable. But At least I managed to get a couple of images down, there may be some hidden value in them....

Looking at what I've done, I do like some of the imagery conveyed in the second set as well as the first, the city of canals has some kind of quaint charm to it (possibly from a passion of mine for the city of Venice itself, a beautiful marvel that almost floats on the lake in which it is located).

Its a plan for the week of mine to get more of these thumbnails done.

Familiarising myself with Maya

Tonight was feeling a bit more productive than last night so, after getting Maya installed on my home computer I thought I'd have a go at using it and seeing how well I got on with it. So I browsed the CG artists' toolkit provided by Alan and decided to have a look at some of the tutorials. Since I was in a bit of a pickle in class on how to do anything but pull the shapes or make the bad kind of random mind-expanding geometry I decided to look up the tutorials to see if I could get better.
By the end of my first Maya session this was probably the best I could do...


Originally a rundown on the difference between NURBS, polygons and subcompoonents, I decided to follow the step-by-step guide of how to make a cup with a polygon.

So the simplest of acts aside from creating a basic shape was using the "insert edge loop" tool. That combined with double-clicking on lines to create the framework did feel somewhat therapeutic.

 Next step was transformations and scaling, which sometimes got a little fiddly. But I pushed on and worked out what to do.
 
Shape is coming along nicely for my first ever proper Maya model. I think I was getting the hang of it by this point.

...Then I went back into perspective mode. I felt like I had screwed up and didn't know somewhere along the line. After a bit of tweaking I realised I must have mis-moved a few transformations so somehow the neck ended up stretched really far. Still, it was only on one axis that it happened so I figured I could fix it. Double-click the furthest edge ring and drag it back. Once in line with the next ring I shift double-click to select the rings and pull them too.
Then I realised the neck had only been shaped from one side, so the front and back were fine but the sides were still essentially tube-like save for a concave bit in the middle. So I came up with a plan: I would copy the model, rotate it 90 degrees then go back into orthographic view and use the duplicate as a template to move the wireframe nodes to the right position, and as can be seen by the cup forward and right, it worked! I had a circular cup with ap roper neck. I found out later the best way to get a result and nto get that was to scale from the box in the centre and nto the arrows, which guarantees an equally-scaled shape.
This was the part I had messed up in class. Simon had showed the class then showed me again the trick to smoother and less doughy edges and I had one of those moments where I understood it...then forgot it when I tried it myself. Now I realise the best method is to extrude fro mthe edge, which took a bit of working out how to do properly, but now I know how to do so: Click the top parameter of the model in the menu on the right, scroll down to "offset", click the word, hold the Control Key and push left or right with the middle-mouse-button held down to pull the extrusion space inwards.
After a few practices and one translation later I'm starting to get hole where the liquid or the egg would go. Then Once its at the right level, I click the "scale" button and drag it out slightly to match the angle of the outer edge, then repeat the extrude process. What I found interesting was after a couple of extrusions the drop was almost automatic, fairly lucky that the exterior faces were relatively equidistant, so I scaled then extruded again.
After repeating the extrusion process on the base, I have something that does look rather cup-like and I quite like what I have managed. It took a bit of time and analysis of the tutorial to get right but I think I am getting the hang of Maya.

FInal touch was giving mroe volume to the rim, made by using the "insert edge loop tool" and then translating up the Z axis to create a wedge around the rim. I didn't need the duplicate cup any more so to save clutter and file size I deleted it, even if this is only a relatively simple structure.
And I hit the Render key and et voilĂ ! One egg cup. Took me a couple of hours and a few repeats of certain moments in the tutorial but the basic shape of my first Maya model is complete.
 Now that I have tried using Maya for something proper rather than some basic geometric shapes I feel a lot more confident with it than when I started. And once I got into the tools it got more comfortable,  I was willing to keep going even if one or two points felt slightly tedious and some modelling moments I wasn't sure where I went wrong but in the end I am satisfied with my end result. I was also surprised that I managed to create quite a decent model from a single polygon shape. It feels like an entire world of opportunity has opened up for me, that first-accomplishment euphoria is certainly kicking in by now.