Wednesday 21 December 2016

Four: Corrective Blendshaping


  I've been quiet but that doesn't mean I have not been busy. Although a long couple of months did put me mostly out of commission for a day or two.

The transformation of the throat works a fair bit better now. Looks a little more convincing and I find it cool that you can see some of the muscle in action.


  At the moment I have a very slight problem that when adding a twist to the wrist, the value would set itself to a value greater than or less than 1 and it would hideously deform to look like the wrist was grotesquely swollen.


  The arrangement I have so far is the best I can do with the current wrist despite attempts like clearing any influences around the joint before working the vertices. Though oddly this is the only problem site so far as there was no problem working the twist into the shoulder.


Thursday 15 December 2016

Four: Solidity for the Throat


  Today, as well as attaching all the joints to a control, I started adding corrective blend shapes. The first thing to correct was the throat. As unaltered the throat has a nasty habit of caving in on itself despite my best efforts with goal weights.


  Originally it was found that the transformation was probably complicated enough that during the transition the vertices would collapse. during the transition. While my first solution was to add intermediate stages, I had far more success simply building the intermediate stage first. Only needing one which could also provide control over how the transformation takes place.


  It dawned on me how I have a lot of bones in my model. But I don't mind a challenge and what I have os far appears to work effectively.


Adding corrective blend shapes was a minor detour since what still remains are a way for the spine to work, and a function that allows Four's eyes to track the eye control nodes.


Wednesday 14 December 2016

Four: The Face Comes To Life


  With the primary model more-or-less skinned and the groundwork for the blendshapes in place. I mainly worked on refining what I had, typing the controls together and making sure everything blends correctly.


  The mouth still needs to be paired up but the eye, eyelids and the cheeks and brow are all hooked up. Using a system of clusters I concocted a way to control the radius of the pupil. This kind of feature would be especially important near the end of the animation as the doors open and Four is bathed in light. Her pupils would shrink to pinpricks as her eyes adjusted to the bright light.


  When programming the eyelids I also gave thought to widening beyond the "neutral" stance. Which on visualisation really hits a feeling of Surprise in Four


Windows to the soul indeed. Adding controls for the lips will add further character I'm certain. Everything seems to be going well so far.


  Proof that there is a weight network in place for the lips.


Tuesday 13 December 2016

Four: Joint Weights and Blendshapes


  Building on what I started yesterday I have modified some areas where larger joints meet. The leg currently has a nasty habit of caving in when the leg folds up like above. In theory I could either allocate more weight to the shoulder, or fix with a bit of corrective blend-shaping.


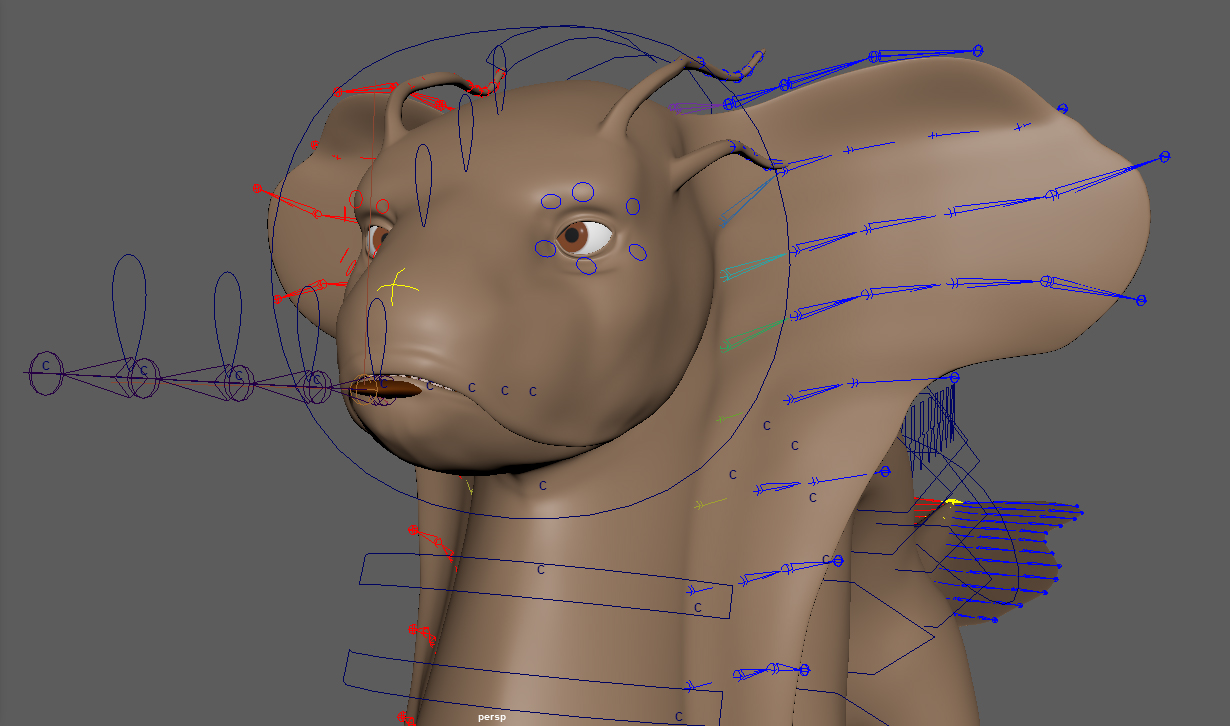
After some adjustment to which boners are parented, Four's tongue can now more correctly dangle from her mouth. However the spline IK has a small habit of tilting the tongue when the head is re-positioned to a direction other than straight forward. With testing however, I found this can be offset by adjusting the roll of the IK - an attribute I can easily add into the head control. 


For the most part the tongue stays inside the body, however extreme deformation around the throat has it poke through but this could be easily solved with a corrective blendshape.


It might be nice to give the tongue a bit of "slack." Where when she has it out like above, it can dangle. As a component to the tongue's flexibility, and in part because it's wider than the gap between the lower canines, I've gone back to the thoughts on ways of deforming the tongue.


As well as  fixing the main model, I took the time to bind the controls to the blendshapes. I need to create NURBS to control these but they can easily be basic squares or a set of controls that circle eye. I also took the time to lay groundwork for a way to control the lips. Priority is on the upper lip for now as that is probably going to be the most active. I've been wondering if as a way of reducing filesize I can use one of the already-present blendshape models, ,most likely the shape controlling the eyes as there will be zero interference from the other weights.


Monday 12 December 2016

Four: Weights on Flexible Parts


  Work continues on the more fluid of Four's components. Using the component editor as a way to more promptly adjust the strengths of the weights primarily due to the sheer quantity of bones in the model. Which provided some difficulty in managing all the joints from the perspective of painting skinned weights.


  There's still some refinement to go. Rather than an equal balance for spots where there is a two-vertex gap difference, I might try o.75-0.8 strength for closer joints, something that can even out to 0.5 strength somewhere in the middle. The result of 0.5 being in the middle however is shown below, which feels untidy.


Friday 9 December 2016

Four: Early December Skinning Sessions


  The past couple of days my primary focus has been on skinning Four and making sure everything works correctly.


  There are some spots where the geometry basically collapses but I feel confident this can be fixed using corrective blend shapesto ease out the deformation.


  There is still a bit to go like the fins which I i predict might take a day or two. But the blendshapes for the eyes and brows. I am also thinking of a set of nodes for the cheeks as by performing expression tests with my face I noticed that when squinting or frowning the lower half of the eye rim is pulled up


  Then I might also need a similar set for the lips. Next week is going to be interesting to say the least.


Stored above the model is a transformation-free blank copy of the gemoetry that can be used for the blendshape deformer controls.

Tuesday 6 December 2016

Four: Starting Skinning


  After some reworking of the skeleton and the geometry I have moved on to building the body and attaching the bones to the skin for animation.


I might rework the jaw, move the joint so the jaw isn't as disjointed.


  I figured I can control the nodes of the fins from the controls attached to the main vertebrae. It's going to be interesting painting these areas as there are a lot of bones to work with.


Monday 5 December 2016

Four: A Cleaner Model


I've continued to refine the geometry of the core model. While also dedicating some time today to refining the UV maps to take into account the merged fins.


  There is a fair amount of dense geometry but in this case maybe that is not entirely a bad thing in certain places such as the neck or the fins where the body is going to be extremely flexible and mobile. It also gave me a chance to clean up some of the gometry so the model flows much better and more tidily.


As an added bonus, the geometry so far has provided a relatively outline muscle structure which can be further improved with a normal map or a Mudbox pass. Though given I need to skin soon, I might go with a normal/displacement map crafted in Mudbox.


  The new UV map has been rearranged a little bit to take into account the changes to the geometry.