Friday 27 March 2015

Life Drawing 26/03/2015


    The final life drawing class of the year was once more with Lydia, who used a piece of fabric and a large purple feather as a key prop. We were told that the final life drawing class would have a Moulan Rouge feel. The other key thing was a long series of quick drawings as long as three minutes and some as brief as 10 seconds, which required me to focus on the essential shapes, which was very fun as I gained an idea of some of the various flowing shapes that the human body can form, and working this rapidly helped me to realise that. I was intrigued by the shapes I saw and I believe I have gained a better understanding of how I could draw characters in future projects.

Thursday 26 March 2015

Infiltrate Exploit Spread: Lower-resolution Merozoite Construction


    Using the higher-detail Merozoite as a foundation, I dedicated some time to create a lower-resolution merozoite which will be used in large-ish numbers to represent swarms of Merozoites that would infect and overwhelm red blood cells. Depth and definition on these would be shown with bump mapping as they will most likely be small enough.

Infiltrate Exploit Spread: Merozoite


    I tried to keep the Merozoite design simple as the plan is to use these as swarmer machines in two sections. But bearing this in mind I should probably consider creating alternate lower-rez models that I can use en-masse for scenes where the merozoites infect everything and not overload computers that try to render many tiny yet super-high-resolution models.

Infiltrate Exploit Spread: Sporozoite


    As I had promised myself I began work on the other microbes today, starting with the Sporozoite. The geometry might be more detailed than I need it to be but the basic shape is there. I think I can quite easily create the depth of the rubber tubing look I had considered by using a bump map rather than as detailed geometry.

    Considering adding a cap of sorts to represent a "head" as well as hide when the rings of the tubing get so small they start getting hard to notice or sart producing textrer glitches.

Wednesday 25 March 2015

Mosquito Construction: Early Revision


    As I said I would I have remodelled the mosquito and for a couple of hours work I feel I have made considerable progress. In terms of gemoetry all that is left for the fundamentals are the head, legs and the abdomen. I will then mirror the geometry to get what should hopefully be a completed model. I cannot say for sure but the geometry does feel neater than the previous version.

Considering the length of time taken I will put this to the side for now and prioritise on the microbes for a bit.

It seems neater than before...

Tuesday 24 March 2015

Maya Techniques: Background Mapping

    One of the things I created in one of Simons' classes was a scene created by linking the textures of 3D polygons in a scene with a background image to make a scene seem more painterly while also taking into a coount shadows and location.

Infiltrate Exploit Spread: Initial Tunnel

Created some basic mock-ups for the blood vessel. Because of the structure I found a little difficulty in lighting it the whole way though. But so far a spotlight appears to do a good job of basic illumination. I toyed around with different lighting and ambient occlusion settings

1: FIrst attempt with basic light and ambient occlusion setup. Seems very dark near the end though
2
3: Tweaked the brightness of the blynn and the ambient occlusion node
4: I upped the raytracing on the spotlight. This created softer shadows behind the rings and less of a film grain look.
5: To add a feel the tunnel is continuous I considered giving the tunnel a slight bend, which would be joined at the end by a continuation of the model I have right now for the tunnel.
With image 5 I like how the bend in the tunnel adds a certain flair to the hilights especially near the end.

Mosquito Construction: Early Modelling

    I began work on the mosquito earlier tonight. However I suspect it may be more complicated than it could be, particularly around the intakes. It is probably because of the way I have traditionally made rounded geometric structures so I think I will need to find a new method in creating the jet as more geometry will lead ot more rendering time.

This could probably do with a lot of cleaning up
I could make the side intaxes separate from the main body. The messy geometry right now I worry could lead to messy texture stretching or messy UV maps i nthe later stages.

Texturing Tutorials

    Slightly delayed. But on Monday's Maya classes we were introduced to a couple of useful texturing techniques as well as being introduced into using furs, the latter of which I was surprised by how quickly the images were being rendered. Then again since Maya's rendering has a lot of number-crunching behind it there may be a couple of complex algorithms being used that speed up the process, as some very interesting textures came out of combining the qualities of more than one animal's coat.


    Here is the result of the double-sided texturing tutorial, that was uploaded to a new YouTube channel I created so I can more effectively demonstrate my work than I have done by uploading directly to Blogger.

Channel link: http://www.youtube.com/channel/UC-HAPiE_EwqQ-45QRbCl4Nw

Monday 23 March 2015

Mosquito Development: Orthographs


    Taking advantage of render times on a Maya tutorial I decided to work on orthographic designs for my mosquito so that I can get around to building it in Maya over this week. I decided it was important as I estimate this to be the most complicated prop in the animation so I will need to set time aside for building it. I will see later this week if this is enough to build it or if I will need to reduce it to line-art to construct it effectively.

    I went this direction for two reasons: For production art purposes and it allowed me to easily block out the shapes of the thing. The front Orthograph is missing its head but that was so I could work out what the neck was doing.

Photoshop Studies: Self Portraits

    Today was a very interesting Photoshop studies class. We were given a small mirror and tasked with creating self-portraits. Unlike the last studies we were not set a specific time. Instead responsible for timing ourselves to make four quick studies in the space of an hour. It was fun to get into skin and hair texturing in this lesson and I believe the final piece reflects this as it seems to have come out rather well despite my comparative lack of experience with faces.

    The next two hours of the lesson were then devoted to creating a detailed piece (above). Because I felt that one of my studies was quite successful I decided that instead of starting fresh I would build up on it, one of the key moments during its creation was advice about finding a way to make the skin appear less smooth, so I experimented with a few brushes to see which one would give me the best texture that I wanted.

    There is still a little distortion as the mirror I was given made my head taller than it really is, hence why a couple of the below drawings look like someone rather different.

Sunday 22 March 2015

Maya Tutorial: Eyes

    The tutorial on the eyes were a fair bit simpler and easier to grasp than previous tutorials, however this could be because I am getting more familiar with rigging.

    My only concern is that when it comes to creating the blink and eyelid movement mechanics I can either have one or the other and not both, although this may be solved by looking a little deeper in the driver editor as whatever I put into the driver editor overrides what I set up in the connection editor and vice versa.

    If I cannot find a loophole, at least the mechanics for opening and closing the eyes are still there. So when it comes to making characters blink it'll just mean collectively changing these settings rather than using a single parameter. Having the mechanics for having the eyelids separately working is better than only having the mechanics for blinking.

Maya Tutorials: Rigging Arms

    I have been meaning to catch up on Maya tutorials as I fell slightly behind but, I am glad I have this part done as I imagine animating legs will be somewhat important in my animation even if it is only for a brief moment, but the small touches can go a long way to turning something good into something brilliant.

Saturday 21 March 2015

Review: Reservoir Dogs

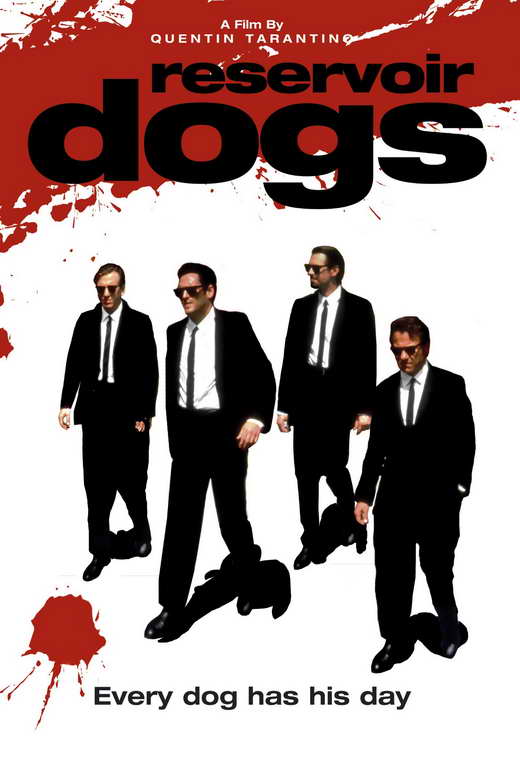
Figure 1: Film Poster (Movie Poster Shop)
  • Native Title: Reservoir Dogs
  • Primary Language: English
  • Format: Colour
  • Year of Release: 1992
  • Budget: est. $1,200,000
  • Film Length: 99 minutes
  • Production Company: Live Entertainment, Dog Eat Dog Productions
    A film by then-unknown director Quentin Tarantino, Reservoir Dogs is the story of a Los Angeles diamond heist gone bad. But instead of a typical progression of a heist, the event is pieced together from the fragments we learn as everyone tries to work out what went wrong, how, and what to do next as the LAPD searches high and low for them.

     While many films explain what happened prior to the present through either flashbacks or exposition, "the film fills in vital information via an assortment of flashbacks. This is an ambitious structure, but Tarantino pulls it off with panache" (Billson, 2015) and there is only one real moment of background exposition that is not backed up by a flashback. The storytelling as a result is fluid, with information coming out as needed but not being a complete infodump when it comes, such as the introductions of how each character in the warehouse was recruited including humour as well as serious business. These flashbacks don't feel like information being forced onto us, but instead feel like stories within a story that make up a rich and well-developed environment without too much worldbuilding.
Figure 2: Actually giving us the image of four county sheriffs in a public toilet makes the whole thing
that much more enjoyable. (Page, 2013)
    The film's language can be something of a guilty pleasure "What makes these characters seem so tantalizingly alive and true? Perhaps it’s simply this: In a civilized world, where people have to watch their tongues on the job, in the classroom, even, perhaps, when speaking to their loved ones, there’s something primal and liberating about characters who can let it all hang out, whose ids come bursting forth in white-hot chunks of verbal shrapnel." (Gleiberman, 1992) In real life, casual conversation - especially when things are tense - is not always something out of Pride and Prejudice or a Shakespearean play and Tarantino, although possibly exaggerating it under the image of macho (each of the characters save for Joe Cabot (Lawrence Tierney) is old enough to have either grown up or lived their prime in the age of testosterone-fueled 1980s action movies), does well to evoke that young highly strung urban men are loud, confident and sometimes aggressive. But it sells the dialogue-filled film as there is plenty going on to keep you awake.

    People Magazine however, disagree with this idea but in doing so they bring up the other side of the dialogue's richness. "[Tarantino] seems to think, for instance, that your average armed robber-murderer spends his off-duty hours sitting around philosophizing about tipping waitresses, engaging in pompous textual analysis of Madonna songs and playing movie trivia games." (Novak, Gliatto, Kaufman, 1992) Tarantino is on the right track - robber-murderers are people as well. They're lawbreakers sure but why should that prohibit them from talking about movie trivia or expressing their opinions? Tarantino in fact explores his characters and though casual conversation we stop seeing them as dyed-in-the-wool criminals and see them as people we might know, maybe even people we'd hate to see die.

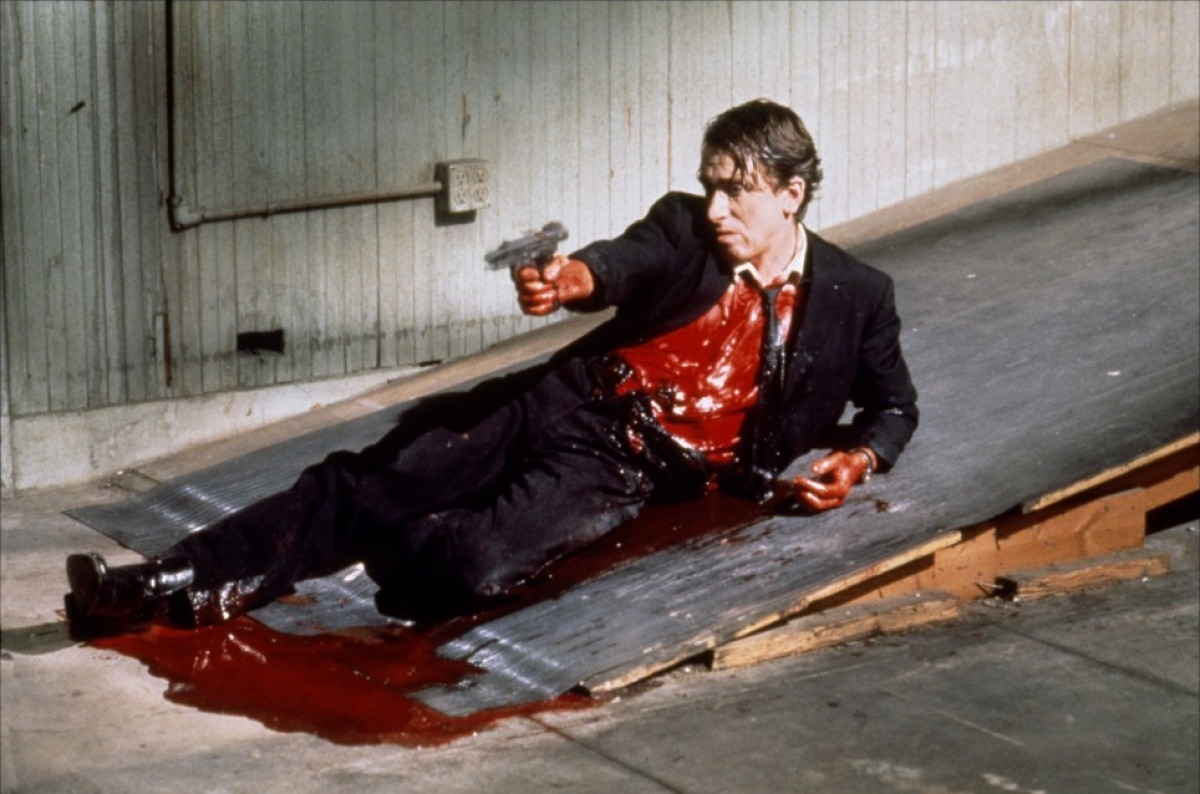
    But it's not just through the dialogue, that the film solidifies its cast members to be hot-blooded and impatient. "Strong violence is Tarantino's passion, and he embraces it with gleeful, almost religious, fervor." (Turan, 1992) there is blood, lots of blood and Mr. Orange appears to spill the most of it as by the end of the film he completely ruined the back seat of a car and ended up red-shirted and surrounded in a pool of his own blood at least a metre and a half in radius. But the most significant scene has to be when Mr. Blonde cuts off the ear off an LAPD officer to the tune of Stuck In The Middle With You with no reason given other than because he was bored. When there are gunfights, either it's one bullet, or what suspiciously feels like more than a single magazine for a 9mm pistol.
Figure 3: If I could sum up the film's atmosphere in one image, it would be this.
    The other intriguing thing to note is that as well as Reservoir Dogs' dialogue being full of enough curses and prejudiced comments to warrant millions of angry letters, it's also smart. The heist members are shown as "The type of crowd that follows the question of "Did you kill anybody?" with a perfectly natural "Any real people or just cops?"" (Turan, 1992) with the other great line in my book by Mr. Pink being "If you ----- beat this ---- long enough, he'll tell you he started the ----- Chicago fire, now that don't necessarily make it ------ so!" as despite their aggression and the comic tone of the film, they know torturing a policeman will get them either nothing or a lie (something that is shown to work in shows like 24). And rather handily establishes that Mr. Blonde is a sociopath as there was no other reason for causing pain to and waterboarding (with petrol no less) said cop other than entertainment value.
Figure 4: Very few interrogations start with the interrogator dancing towards you with a deadly weapon. Solid evidence that
finding out what you know isn't one of their priorities. (Gerasimov, 2015)
    I would rank this film as a guilty pleasure. It's crude, it's brutal, but it revels in its silliness and it's ability to convey very memorable characters from the "We're professionals!" of Mr. Pink to the "allcaps who cares about your ear I'm bleeding all over the floor!" of Mr. Orange. The ending was tense and satisfying and reminiscent of a Greek tragedy where everyone we meet either dies or may as well be dead. Macabre as it sounds, the last bullet of the film feels like an impact to the viewer's heart.

Bibliography
Image References

Friday 20 March 2015

Texture tests: Mosquito Skin

    These are some basic bump map tests I constructed to test out my mosquito texture idea. They're a little dark admittedly and in some respects they may look more like stone than ceramic (the third one possibly more than the others) but the good news is the texture can be considered tileable, which will be useful when it comes to adding it to a more complex model. like the mosquito itself.

    I might have to turn the tone up anyway as according to my research it's only really the SR-71 Blackbird which is near-pitch black. Other stealth jets are more a charcoal or grey colouration. That and my current concept sheets have it a light charcoal colour rather than near-black.


Mosquito Development: Body And Texture Tests


     Making some progress with the head I decided to see what fit best with the body and what the best position and neck length for it was. I personally like 4 and 6, there's something about the stooped head that I think makes it look appropriately menacing.

    I also made an attempt at a texture for it. I looked at stealth bombers and fighter jets to get an idea of what kind of material is used as while the body might be smooth enough for a shader, a bump/specular combination could really bring out the texture on the mosquito. Before I do those though I need to perfect it to be tileable, something which I will look into tonight and possibly over the weekend.

Thursday 19 March 2015

New Gamete Combination and Texture Idea

 
    While attempting to resolve what to do for the look of the sporozoite I had an alternative idea for the gamete cells combining: Instead of the male slotting into the female, they could instead twist around each other and begin merging as the ookynate/zygote shell begins surrounding them.
 
    The main argument was that the sporozoite looked too different, too disparately organic from the more pellet-like merozoites and gametes. But I also want to keep a machine feel to it.
 
 
     This was a rather hasty attempt to create the below material which I feel is both Gigeresque and as a form of industrial tubing it adds a machine-feel to the objects that it covers. So it could be a way to explain the flexibility of the sporozoites and gameetes without making them look too organic compared to the merozoites.


Fantastic Voyage: Sporozoite Development

    Some concept ideas for a revised sporozoite. Although I am tempted to restore the spikes that were on my last concepts for it.

I composed these in basic colours so that I could get my ideas down as quick as I could ,rather than worrying about intricacies such as detail shading as I just want to get the basic ideas down before settling on a final design.

Mosquito Development: More Heads

 
    In response to some feedback I have looked into designing a more insectoid head for my mosquito, while also taking some influence from the cockpits of helicopters. In thinking about it, I might go the route of a robotic mosquito rather than a jet that happens to look like a mosquito although perhaps the design is not so far out that it doesn't look like something that could be piloted.
 
    Which made me wonder about the option of including the antennae and pulpa, important components of a mosquito's head - antennae particularly are characteristic qualities of insects - but it might subtract from the machine aspect unless I include them as radio antennae. And then there's the issue that very few antennae are designed to be pointed against the direction of travel  because the wind resistance would logically break them. Keeping the antennae off the body might make it look less insect-like, but it also streamlines the design and means I have less to animate.
 
    That and the sight of wobbly antennae might end up making it look less threatening. One alternative could be the use of pylons instead of antennae, which would achieve the effect of saying this is an insect and their rigidity would not make the thing look so silly..

Tuesday 17 March 2015

Mosquito Development: Head

    I gained some extra feedback suggesting I change the head such as making it smaller and much less bird-like. In response, I have looked into what I can do with it. When I looked at Mosquito heads under a microscope I noticed a common pattern in that the heads were completely covered with compound eyes save for two places: a snout connected to the proboscis and the base of the antennae. So I tried to use these elements to create an interesting nose and cockpit window as I wasn't sure about making the head all-window considering the implied speeds this thing will be going. I like how the combinations of 4 and 5 turned out

Mosquito Development: Legs

The body itself is still due for some tweaking, so this look is not set in stone.
    Following though with my thumbnails I looked at designs for the legs. I want them retractable so that the mosquito's profile in-flight is kept minimal, and they would fold out as the creature lands. One idea I have is that the feet are folded up and open out to hope plant the mosquito into the surface it lands on. I also tried experimenting with deployment distances. My current thought is that no. 4 seems the best balance. Again, in actuality the mosquito's knees rise high above the torso but If I want to include this design it will mean I also need to consider retractable wings.

Actual mosquitoes have hairy feet which resemble a segmented toe, but I thought this was too far from the machine look, and at a distance most insects appear to have very tiny feet anyway. No. 6 I am considering indicating prongs on the underside. These particular feet however best fit my idea of folding-up feet and were based on a thumbnail back in the first week that I had considered using on the merozoite model.

Thumbnail Updates


 These are thumbnails I had been meaning to upload for several designs for the Fantastic Voyage project. The two bottom pages include designs that I had considered post-pitch for the legs of the mosquito jet although I am settling for fold-out legs with pincers on the foot in order for the machine to secure itself ot its host before feeding.

These legs will fold into compartments that I have included on the sides of the mosquito's body on the recent concept piece.