Showing posts with label environments. Show all posts

Sunday, 31 December 2017

Last of the Old Year


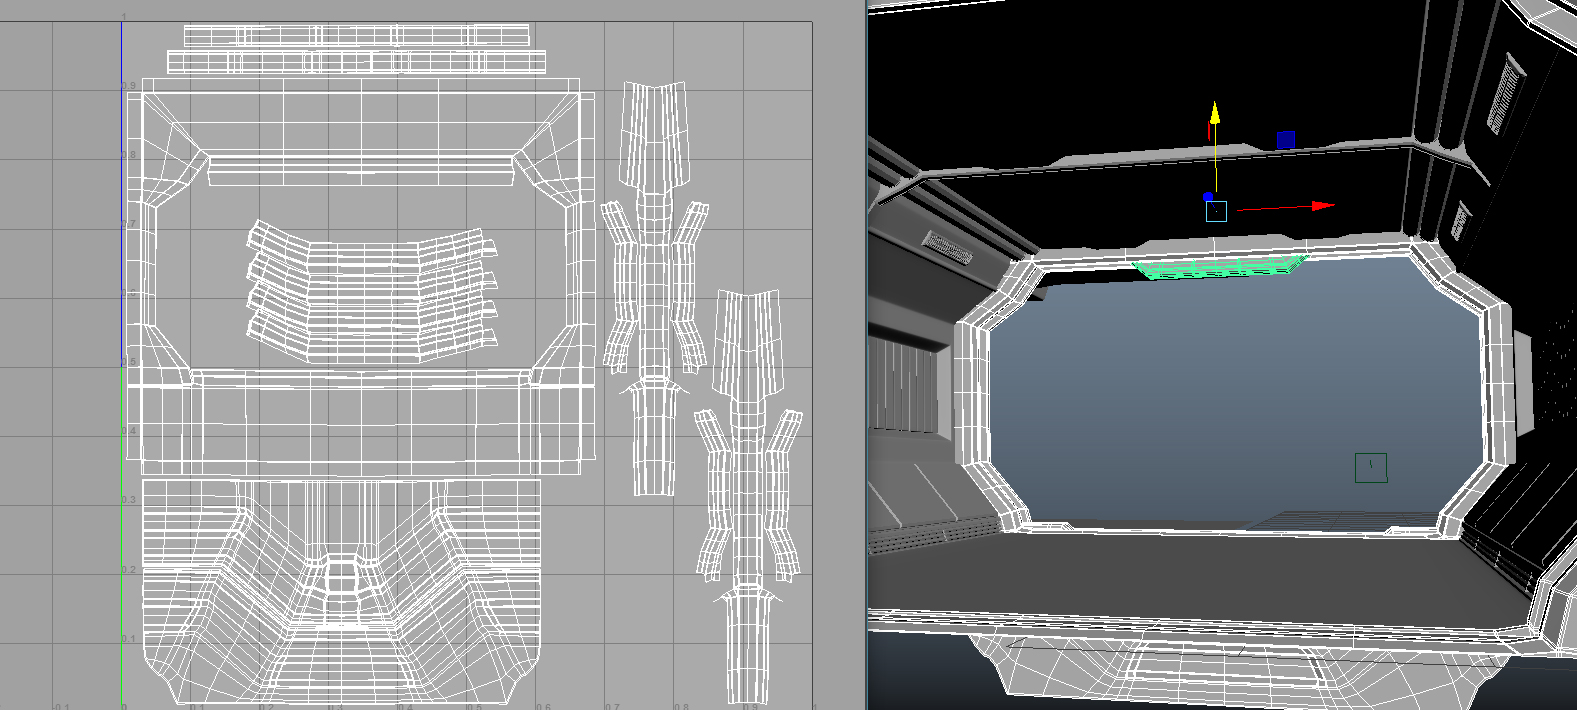
A new year has dawned, 2018 has come so at a slight delay I introduce some of my last bit of work for the year. The main area for the Dwarven fortress was the start, so with time today I looked into refining the elements which could apply to the rest of the structure. Which have given me a chance to look into how the UV editor has changed since 2016 extension 2 (turns out a fair bit, not least of which the arrangement of the UI).


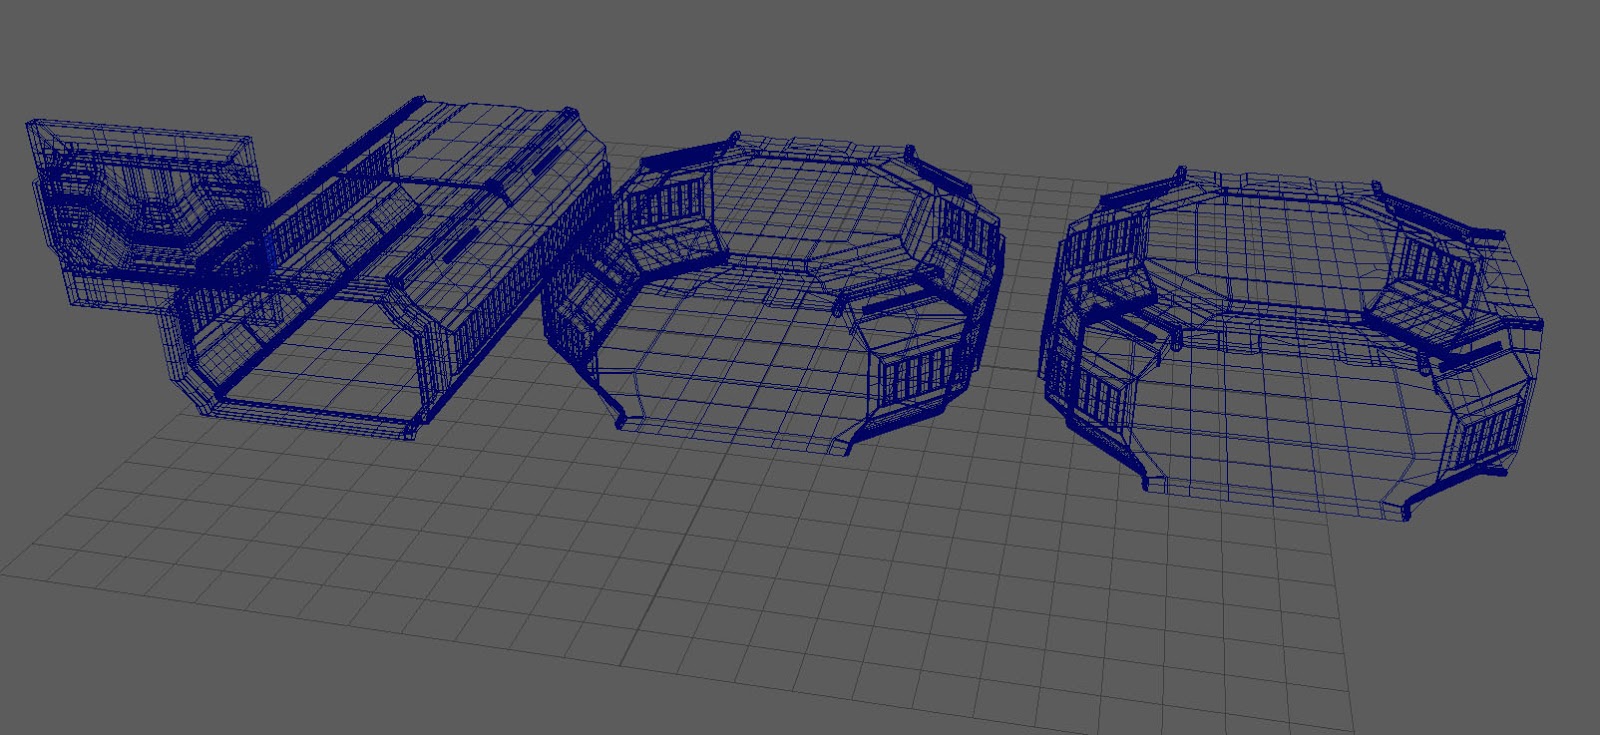
  The stairwell was an interesting concept to work with - it needed to fit the hall, but also be shallow enough to plausibly allow carts to travel up and down it. Holding the whole structure up will likely be large columns that extend the whole way up and down.


  Some geometry cleanup, a ceiling and a tweak to the length of the tunnel and the model is taking shape. The next likely stage is to block out the rest of it with simple geometry - clutter might not come until most of the structure has been blocked out but one of the really fun elements I'm looking forward to is that the site within the Dwarf Fortress playthrough sits inside a huge deposit of marble but also shale, feldspar and some microcline.


While the structure is predominantly white, this means that there could be plenty of opportunity for other colours that add variety like warm greys, teals and either rose or terracotta.

Tuesday, 14 February 2017

Four: Biolab Incubation Unit


  After some thought it was considered that for the plant and grub stages, an incubator was more appropriate for housing the creature than an isolation unit.(shown near the back). The subject can be observed from all angles and a layer of soil will provide the ideal environment to nurture Four in her mossy life-state while also studying her. The screens on the incubator can be used to convey information for scientists and the viewer.


  Today's session also gave me some practice with adding glass. Refraction was considered but first attempts resulted in more reflection. Later tests could refine the mechanic as these are set up primarily as two planes that fit into the grooves all the window models have.


  To demonstrate that Four is one of a number of experiments, the lab will contain several chambers. This will make it easier to view hers from the office and can show the company has several experiments going at a time, The rearrangement of features could also suggest relocation to different labs. A laboratory for nurturing plants or grubs might have different requirements compared to a lab designed to handle animals .


I had fun designing the LEDs and the knobs for controlling settings on the incubators. There is an air that part of the design could include clutter, though 1960s-period science fiction tended to be a lot cleaner, with pipes and wires being hidden. SOme variance in the LEDs could be given - blues, yellows and whites that would flash to give colour variance.

Thursday, 9 February 2017

Four: David's Desk Part One


  With some of the larger models out of the way, I had the thought that while the camera needs installing, some smaller models could be made, mainly for things I feel sure would be seen in the world. David's desk will take some focus at the very least so at least I have some assets to experiment with when setting up cameras.


  This was all after designing the finer details on David's computer terminal. To give some authenticity when in a close-up view, I took to modelling the keyboard key-by-key and arranging the UVs to correspond with their arrangement on the board.This sort of arrangement will make it easier when creating the texture maps for the keys. Once complete I designed a low-resolution "cover" that would display the keys' definition as a normal map and maybe extrapolate the textures so at a distance the solid block looks like a convincing keyboard. Drawing from how I designed Four's mouth,  an indentation was created to provide for an area for the keys to be set into, The edge can be just-about seen so it does not look like the keys are simply phasing into the surface of the computer's keyboard extension.


  The size of the computer terminal necessitated the need for for more space on the desk. Geometry was pushed forward slightly and the UV maps were re-adjusted accordingly to square out the stretching.


There might be some way to go, and before I get into science equipment like microscopes, centrifuges, test tubes etc. I have some experience with college-level genetic science, experiments included, I have some understanding already of the kind of equipment that might be practical for microbiological research (Alfonse's field of study in the story) and DNA sequencing. Although a combination of camera-work and estimates on what to focus will determine just equipment to keep, as some devices and equipment I understand might not be recognised by a general audience.

Wednesday, 8 February 2017

Four: More Biolab Furniture


  Work continues on the lab, enough that I can provide some rudimentary render/colour tests. Most elements have simple blinns and lamberts with an ambient occlusion ode, while the metal was given a basic chrome shader to make it look more properly metallic.


I felt my initial table designs were not the kind of science fiction atmosphere I was aiming for.


A first design I had was a more trestle-table look, but reflecting back this was the wrong kind of structure for the table I was aiming for so instead I looked into the design feature of metal tubing. I could either have built a frame that planted the table firmly on the ground although the desks that did this offered a gap for the seated's legs and chair.

  The alternative possibility was a more cafeteria bench, where the pipe-like legs went down and then curled up to support benches. This wasn't really practical, like the desks the seated's legs have full freedom and the pipe that supports their seats rise up to go under the seating. So I tried something inspired by the cafeteria bench.


  More UV maps, after looking at references the computer is more convincing. Though I may have to settle for a fully modeled keyboard at close-to-near-mid distance and a mock box at more distant ranges.


Tuesday, 7 February 2017

Four: Furnishing the Biolab


  With the corridor models done I've gone back to the biolab to build David's office and the corresponding articles starting with the largest furniture - the chairs and tables.


  As can be seen by the figure behind the chair, I needed a scale, which in hindsight I perhaps should have made first. It's only basic but it serves the neccesity of providing a means to brig in a more human scale for construction as this is an ultimately human environment. The biolab needed furniture that conformed to human ergonomics. For the furniture I went back to my references of 1970s designs


  So far the components I can call complete aside from UVs are a desk, an office chair, and a stool. While close to completion, the computer terminal in David's office (an attempt at designing a terminal with the elegant sleek side of the 60s while understanding that CRT screens were what people thought would always be used for monitors) needs a keyboard. Looking at my influences (the source of the CRT screen, all-in-one look and integrated keyboard area), maybe the computer is better off with more of a back to it as right now it more closely resembles a flatscreen pretending to be a CRT.


One of the elements of Four's isolation unit that I drew up in concept art was a bed that mostly resembled some kind of bean-bag. With some geometry tweaks, the moulded seats of the stools might work as a foundation for the bed's model.


Monday, 6 February 2017

Four: Corridor Semi-Completion


  The key components for the tunnels around Ceti base are ready for textures and lights. The essential elements assembled are a blast door, a tunnel, a straight intersection, and a T intersection. I might be able to build the focus corridor with these. Although creating an X-intersection will only take me an hour or two to build, it is more a question of whether such a section can be mimicked with camera-work and the T-section..


Because of the number of models involved I am thinking of creating a system where at a far enough distance, the leather panels and the pipes along the bottom are replaced with panels that mimic their look. The same would be the case for the flourescent lights in order to save complexity during renders.


  I feel I can sign these models off for now, and will come back to these for textures, normals and so on at a later date.


  The models are kept symmetrical by mirroring. I create one quarter of the section and then mirror the geometry, then I mirror the UV maps and sew contiguous sections together so that just because the geometry is mirrored does not mean what's on the surfaces has to be. This is also the case with putting UV shells on top of each other. I'm moving away from this to experiment with more varied appearances.


For easy importing and instancing, each segment has been given its own scene file under a special asset folder..

Saturday, 4 February 2017

Four: Corridor Geometry Progress


  The geometry for the corridor elements are almost complete. With this finished I can move back to designing the biolab which will be good as on Friday I had some solid feedback on how to give these different areas character.


  I worked out in a discussion with Alan that I am somewhat blending the two aesthetics of 1960s and 1970s science fiction. To put it simply, the Sixties were more rounded while the Seventies were more angular when it came to shapes.


So while I think I can find a synchronous level between the two, the idea we settled was that the corridor would be industrial. It would have that grey, gritty Seventies feel while the biolab would be something of a blend of the two, most importantly the biolab would be quite white; it is a clean space and the first impression that the viewer would get is looking though the windows in the corridor into this bright white laboratory, with the pure-white isolation units at the back.


   One of the selling differences would be light fixtures. More industrial sites tend to cage their fixings to safeguard them from the heavy duty operations. So the idea came to install these caged flourescent lights inside the corridors while the biolab would be downlit from wall-embedded set into the upper sections of walls.


  However an alternative location for these lights could be in the ceiling. Maybe they could even be on a track and hanging down.


The UV map for the corridor is fairly large, but to create space I might reduce the size of the ten panels at the top, which will allow me to increase the size of the main element of the corridor i nthe centre of the map.


Tuesday, 31 January 2017

Four: Building Biolab Elements


  Work continues on the biolab, and the template system I suggested in my last post is working well to an extent. It takes some reshaping in some areas but so far everything works. I plan ot leave UV mapping the rooms themselves to be the last stage, when all the other construction is complete.


  To control light exposure and mitigate objects phasing though solid surfaces, I created grooves that doors can slide into but should the camera catch sight of the inside these areas. This design will be especially important, come to think of it, for the isolation unit doors, which have large glass panels that will likely end up phasing though the current models.


The door designed for the offices works just as well for the decontamination unit used to enter the laboratory. This room can easily be furnished with a bench and lockers (the lockers could be kept opaque to avoid designing hanging coats or hazmat suits) to fill the space.


Wednesday, 25 January 2017

Four: Progress on the Corridors


  Some work continues on the biolab. While the door and most of the corridor could be signed off on, they need their UVs fixed. The more distant sections of the corridor give me a good idea of which models to create normals for the more distant sections of the scene.


After changing the bracing I believe the door looks a lot more plausible now. A console to open or lock the door is planned ot go inside the indentation in the centre, which can help give an indication of the size of the room.


   To keep up the pace, the biolab was next on the list. The door to the isolation unit feels complex due to the unconventional shape, and I wonder if the indentation can be done with a normal map for more distant instances. I need to enlarge the room a little and decorate the walls.


  I will need to do research into locaations for potential lighting fixtures. Progress has been a little slowed as the deadline for my dissertation draws near.